Rear-end damage on an EV is a structural question first
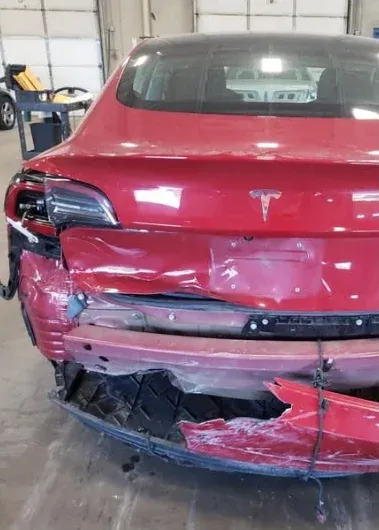
The visible damage was a crease running through the rear quarter panel, a dented trunk lid, a taillight pushed out of its opening, and a bumper cover torn loose and hanging. On any sedan that combination means the impact reached the rear body panel and the closing structure behind the cover. On an electric car it also means the area around the battery enclosure and the rear drive unit has to be inspected before anything is straightened.
That is the real difference between repairing a Model 3 and repairing a gasoline sedan. The floor is a structural battery pack, the rear of the car carries high-voltage cabling, and manufacturer procedure decides what may be pulled, heated, or welded near any of it. A shop that skips those procedures can hand back a car that looks perfect and is no longer the car it was. The procedures for this vehicle are published and specific, and following them is most of the job on an electric car — the sheet metal work is the part any competent shop already knows.
How the repair was carried out
The sequence on this car was set by the vehicle rather than by convenience. High voltage down first, then teardown, then measurement, then structural correction, then panels, then paint, then reassembly and a full systems check. Nothing was ordered until the back of the car had been opened up and photographed, because the crush on a rear hit hides in the trunk floor where the spare well and the rear rails sit.
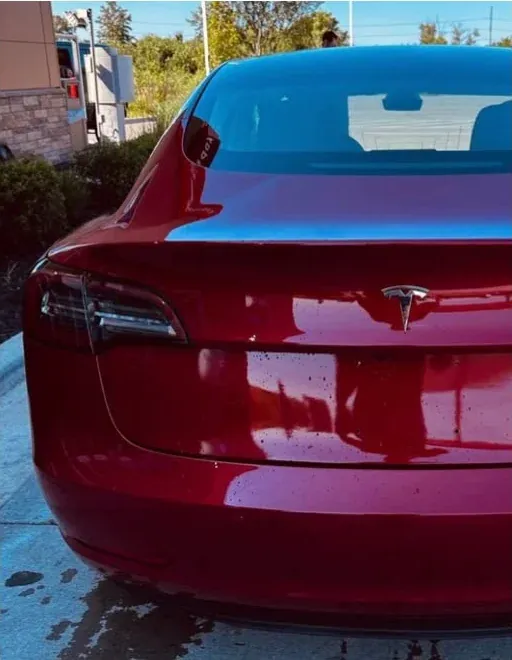
Tesla body panels are also unusually unforgiving of a bad match. Their reds are deep multi-coat finishes that shift with the light, so the trunk lid, quarter panel, and bumper cover all have to agree with each other in daylight and not only under booth lighting. Color was mixed from the paint code, verified on a card, and blended out across the panels either side of the repair.
- High-voltage system shut down and verified before any teardown at the rear
- Bumper cover, taillight, and trim removed to expose the rear structure
- Rear body structure laser-measured against factory specification
- Quarter panel worked back to shape; parts beyond safe repair replaced
- Multi-coat red mixed from the paint code and blended into adjacent panels
- Rear-facing cameras, sensors, and lighting checked before the car was released
What to look for in a repaired Tesla
Start at the trunk. The lid should close with one hand and sit level with the quarter panels on both sides, and the gaps around it should stay parallel from the taillights to the roofline. Then run a hand along the quarter panel where the crease was: the surface should feel like a single continuous curve, with no low spot where filler was feathered out to hide one.
Next, look at the car outdoors at an angle rather than head-on. Multi-coat reds hide their sins under fluorescent light and expose them in the sun, which is where a lazy match turns pink or dark against the panel beside it. Finally, ask what was done about the electronics — rear cameras, park sensors, and lighting all live in the area that was hit, and none of them are optional.